


How to regenerate thumbnails in PrestaShop 1.7?
Modern business requires an innovative approach to website management. Online store owners should understand that the visitor's first impression of the site is based on its design and ease of use. User-friendly interface, attractive design, good product descriptions, high-quality images play a very important role in the development of your business. These and many other factors will help you increase sales and attract many customers. Find out more about how you can increase the conversion of your store in our latest article.
What are thumbnails and why regenerate them?
Speaking about the appearance of the site, one cannot fail to mention another important component - thumbnails. Thumbnails are a smaller representation of larger images that are used to save screen space. They allow users to view multiple images at the same time. Thumbnails are widely used on the web because they enable a web page visitor to catch a glimpse of an image without having to download the full-sized image if it is of no interest to them.
When you upload an image on PrestaShop, it automatically creates multiple sizes of it. This includes product images, thumbnails and other smaller versions of your image. Thumbnails are a significant part of a lot of websites. However, sometimes they may not be the right size and look sloppy on the website. That could be the result of a PrestaShop migration or theme switch.
What to do?
As outlined above, there can be issues with product thumbnails, categories, and so on in PrestaShop. If you're experiencing difficulties with thumbnail regeneration and uploaded images don’t have proper sizes, MigrationPro will walk you through the process on how you can perform the regeneration process in a few simple steps in your PrestaShop 1.7 store.
Step 1.
First, you need to login to the PrestaShop admin panel. Enter the required information and wait until you are redirected to a new page.
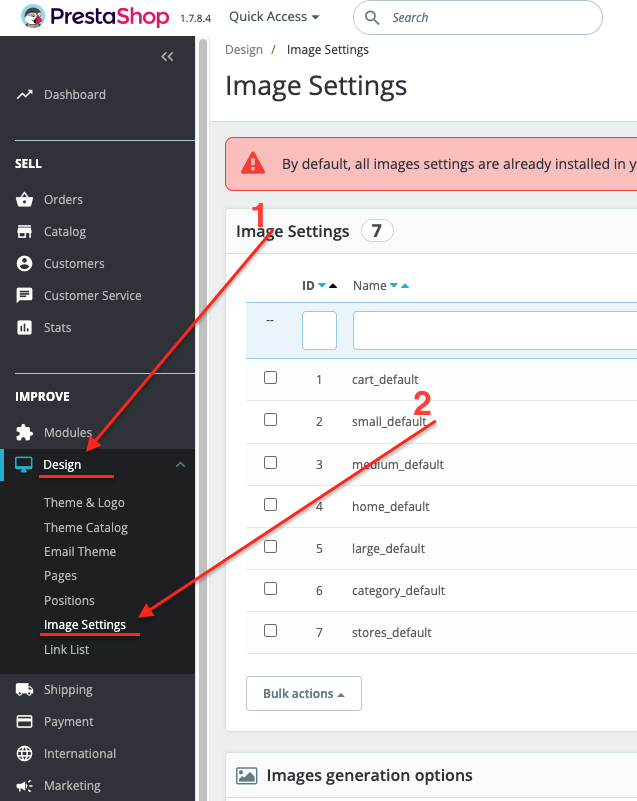
Step 2.
In the left navigation menu, find the Improve section and click on Design. From the drop-down menu, select Image Settings.
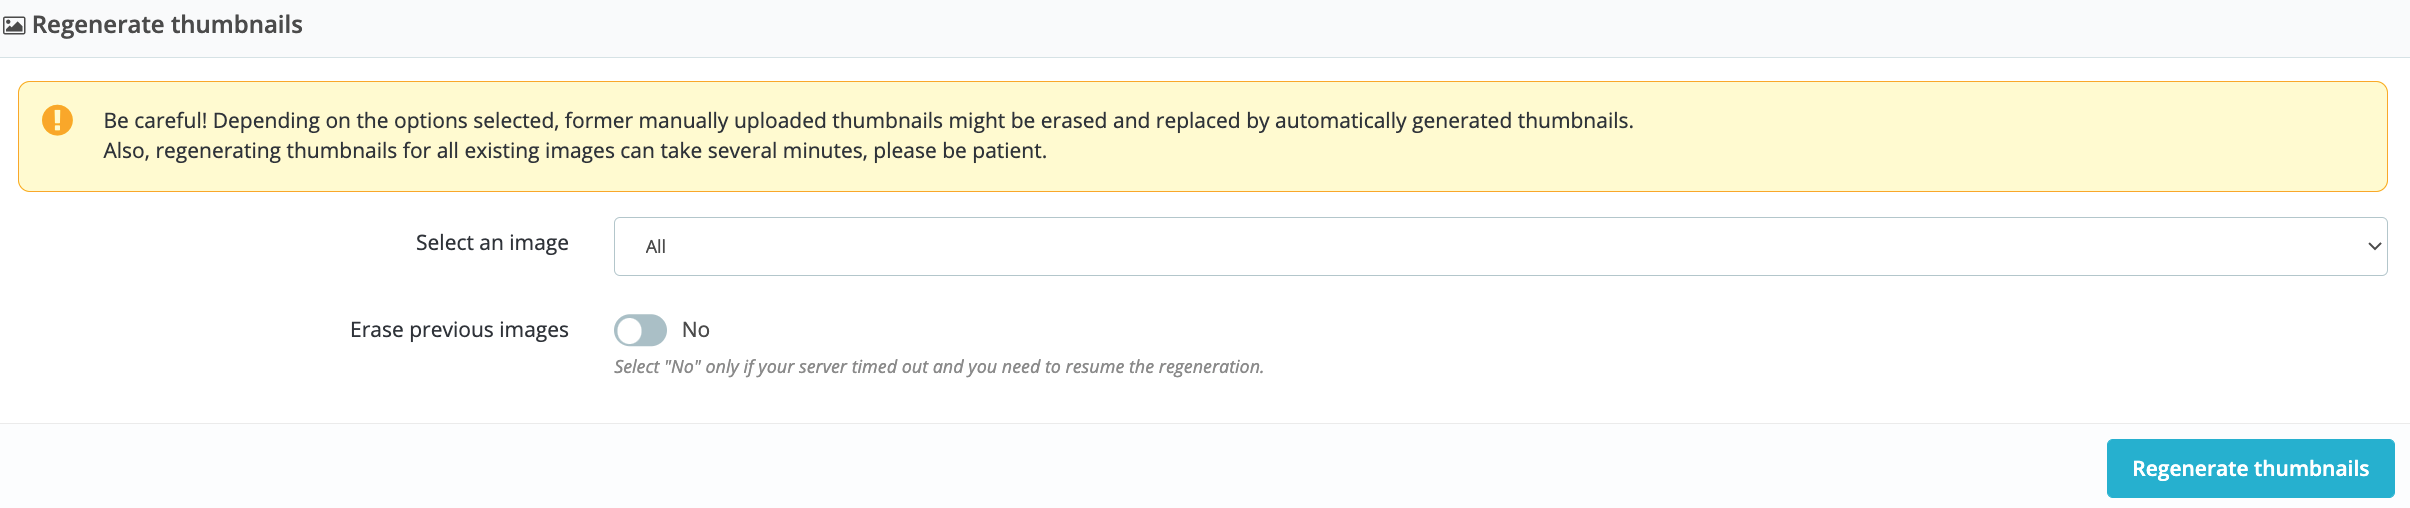
Step 3.
Now scroll down to the REGENERATE THUMBNAILS section. You have two options to choose from:
- Select an image - choose the type of images to be regenerated. It can be product images, category images, etc.
- Erase previous images - only set to No if the server has run out and you need to restart the regeneration.
Step 4.
Click on the Regenerate thumbnails button and check for the results. All the thumbnails will be regenerated soon. If you have many, it will take some time.
This is how you regenerate thumbnails in PrestaShop 1.7. We hope you found this article useful and enjoy reading it. If you require any further assistance or have any questions, feel at ease to contact the MigrationPro support team. We are always happy to help and provide you with the best migration experience possible.
Comments
No comment at this time!
Leave your comment